Applies to: All tiers · Last reviewed: 2026-06-23
What this is
Getting a warehouse ready to ship from: create the locations stock lives in, load your products, then receive your opening inventory so on-hand counts are real. Do these three in order.
1. Create your locations
A location is a named bin or bay inside a warehouse.
- Go to Settings > Locations.
- Click New Location.
- Choose the Warehouse, enter a Location Name, and set two toggles: Sellable (stock here can be allocated to orders) and Pickable (automatic allocation draws only from pickable locations).
- Click Create.
A normal pick face is Sellable and Pickable. A quarantine bin such as "Damaged" should be Not Sellable. To load many at once, use Import CSV (per warehouse). The only required column is name. On import, locations default to Sellable and Pickable, so edit any that should differ afterward.
2. Load your products
Go to Catalog > Products. Add products one at a time with New Product, or in bulk with Import CSV.
For a CSV import, pick one Client as the destination (the whole file imports under that client, so run one import per client). The required columns are sku, description, price. Optional columns cover the barcode, the customs details, the country of origin (ISO 2-letter), dimensions in centimetres, and weight in grams. Use Download Template for the exact format. CanShip shows a preview that counts the new rows, the updates and the errors before anything is written, so you can fix problems first.
3. Receive your opening inventory
Now make on-hand counts real. The fastest path for a first load is Inventory > Import CSV > Import Opening Inventory, one file per client, with columns sku, location_name, and quantity.
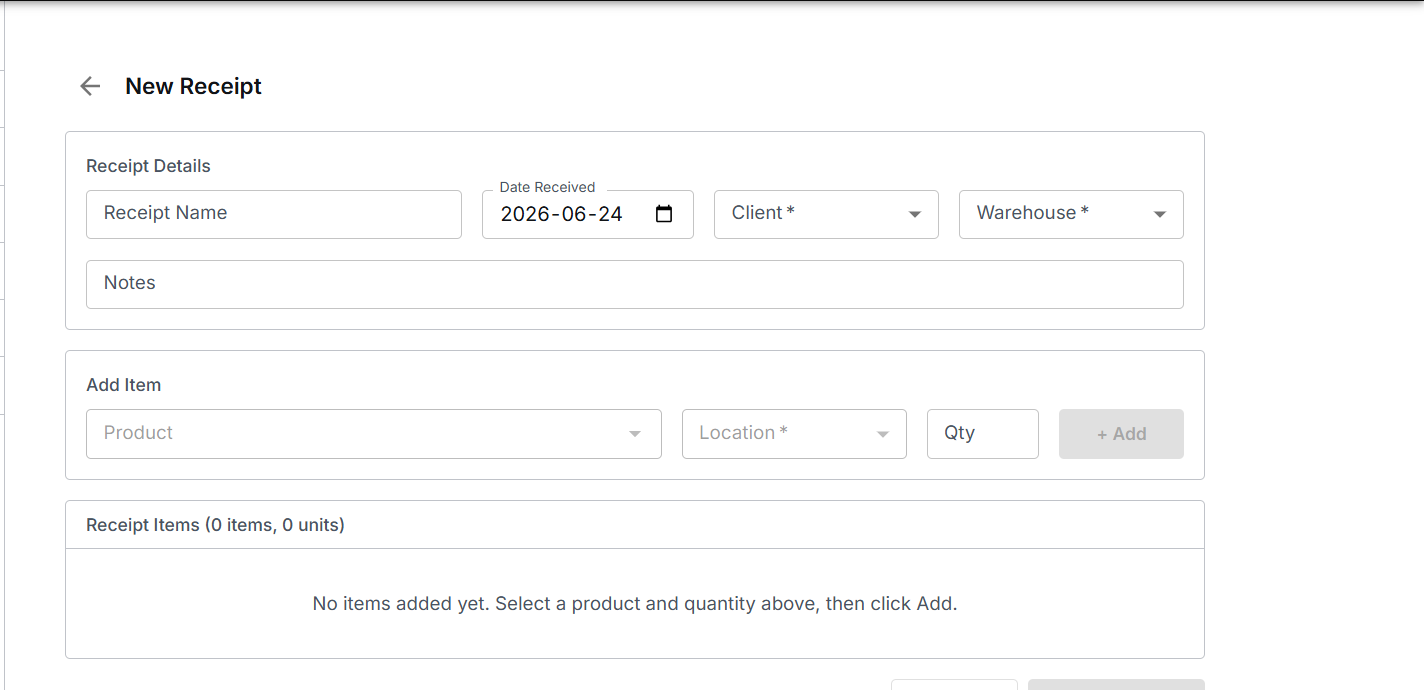
To receive an inbound shipment instead, use Inventory > Receipts:
- Inventory > Receipts > New Receipt.
- Set the Client and Warehouse first (the location field and the product search depend on them).
- Add Item for each line: Product (type the SKU or scan a barcode, then click the option), Location, Qty, then + Add. The location carries over between lines.
- Confirm Receipt > Confirm & Commit. CanShip applies the quantities to on-hand inventory.
What can go wrong
- The product search shows nothing. Choose the Client and Warehouse before adding items. The product search is scoped to the selected client.
- A line did not stick. The product autocomplete sometimes needs a mouse click rather than the keyboard, especially on the first line. Confirm each line landed in the list before you commit.
Was this article helpful?
That’s Great!
Thank you for your feedback
Sorry! We couldn't be helpful
Thank you for your feedback
Feedback sent
We appreciate your effort and will try to fix the article